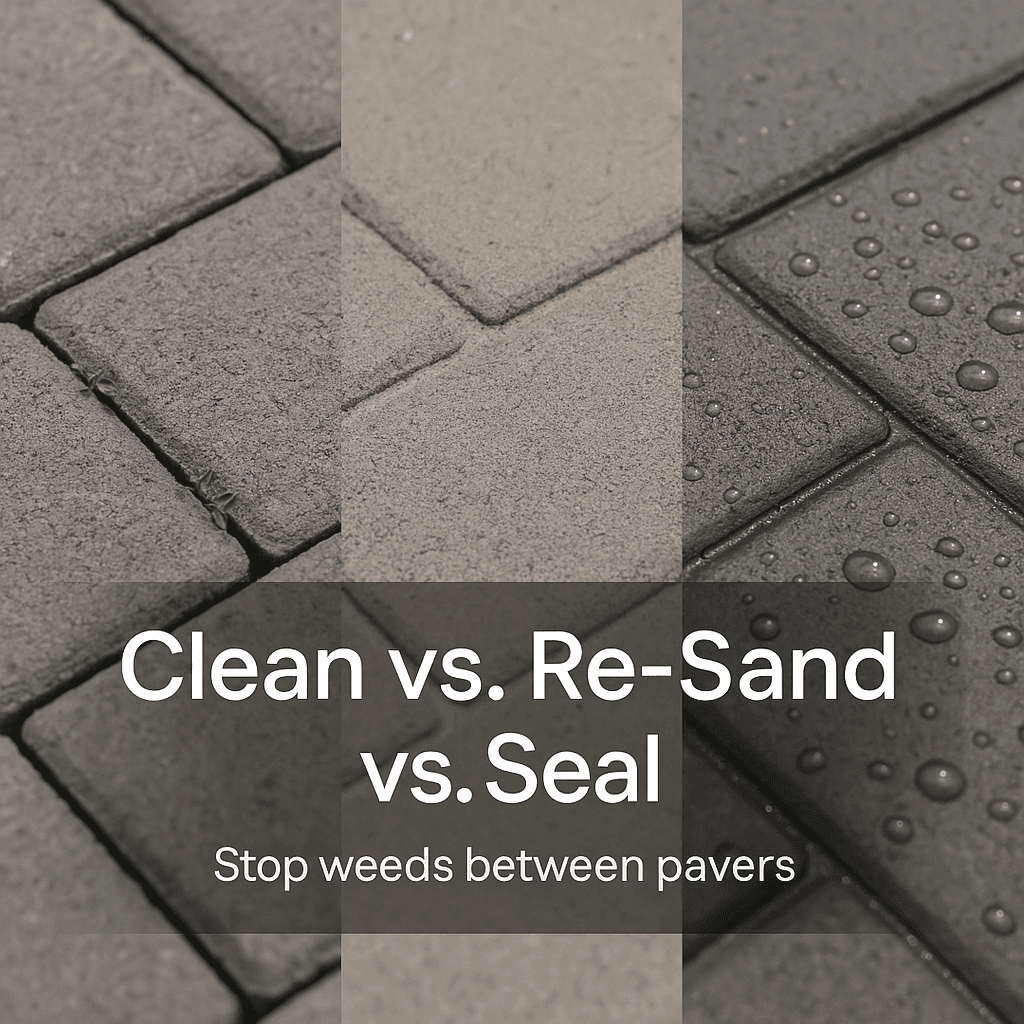
If you have pavers (driveway, pool deck, lanai, walkway, patio) in Naples, you already know the deal.
They look amazing. Until they don’t.
A little green fuzz shows up in the joints. Then a few weeds. Then suddenly you’re out there with a screwdriver, scraping cracks like it’s a part time job.
And the frustrating part is this: weeds in pavers are usually not a “paver problem”. They’re a maintenance problem. More specifically, a joint problem.
So let’s break the real options down in a simple way. When should you just clean, when do you need to re-sand, and when is it finally time to seal?
Along the way, I’ll also tell you what actually works in Southwest Florida’s humidity, and what’s basically a temporary band aid.

Why weeds grow in paver joints (even if you “did everything right”)
Weeds don’t grow because pavers are “dirty”. They grow because the joints become a tiny planter box.
Here’s what typically happens:
- Sand washes out over time from rain, sprinklers, or pressure from cleaning.
- Organic debris settles in. Pollen, dirt, mulch dust, leaves. It builds up in the cracks.
- Moisture sits in the joints. Naples is humid, shady spots stay damp, and irrigation doesn’t help.
- Then seeds land. Or algae/moss creeps in first. Either way, it takes off.
Important point: most weeds are not coming up from under the pavers like a movie scene. They’re usually sprouting from material that accumulated in the joint.
So the “fix” is about restoring the joint system, not just killing the visible weed.
Option 1: Clean only (best when weeds are early and sand is mostly intact)
Cleaning is the first line of defense. And sometimes it really is enough.
When cleaning makes sense
Cleaning only is a good choice if:
- The weeds are small and scattered, not a full carpet
- Your joints still have sand in them (they’re not hollowed out)
- You’re seeing mostly surface growth like algae, mildew, grime
- You want to reset the look before deciding on bigger work
What “cleaning” should actually include
A real paver cleaning is not just blasting everything with a pressure washer for 20 minutes.
Done right, it’s more like:
- Pre-treatment to loosen organics (and reduce regrowth) – this step is crucial as it can significantly help in managing issues such as mold and mildew which thrive in damp conditions.
- Controlled washing that removes buildup without gouging joints
- Rinse and recovery, especially around pools and landscaping
- Let it dry fully before any re-sanding or sealing (more on that soon)
If you’re in Southwest Florida, this part matters a lot because algae and mildew will come right back if the underlying spores and grime stay embedded.
Pros of cleaning only
- Cheapest and fastest option
- Immediate visual improvement
- Great for routine maintenance (especially in humid months)
Cons of cleaning only
- If sand is already gone, cleaning can make weeds come back faster
- Doesn’t stabilize joints or lock anything in
- You might get a “nice for now” result that fades in a few weeks or months
If you want a professional cleaning that’s designed for Florida surfaces (and not the “strip the joints to nothing” approach), this is the kind of work Naples Pressure Washing & Roof Cleaning handles regularly. You can start here: naples-pressure-washing.com
Option 2: Re-sand the joints (the underrated fix that stops the “planter box” effect)
This is the step most homeowners skip. And it’s why weeds keep returning.
Re-sanding means restoring joint material after cleaning, so cracks aren’t empty and ready to collect dirt again.
When you should re-sand
You probably need re-sanding if:
- You can see gaps in joints or sand is noticeably low
- Ants are tunneling in the joints (they love loose joint sand)
- Water is eroding channels through certain areas
- Weeds keep returning even after you kill them
- Your pavers shift slightly or feel less “locked in”
Regular sand vs. polymeric sand (quick explanation)
You’ll hear both terms, so here’s the simple version.
Regular joint sand
- Cheaper
- Easier to install
- More likely to wash out in heavy rain or irrigation
- More likely to allow future weed growth if debris collects
Polymeric sand
- Has binders that harden when activated correctly
- Helps resist washout
- Helps reduce weed germination (not magic, but better)
- Can reduce ants
- Needs proper prep and installation or it can haze or fail
In Naples, polymeric sand is often worth it, but only if the joints are cleaned out properly and the surface is prepped right. If there’s still dirt and organic matter in the cracks, polymeric sand is basically getting installed on top of compost.
Pros of re-sanding
- Makes a big difference in regrowth speed
- Stabilizes pavers
- Helps drainage behave more predictably
- Sets you up for sealing (if you choose to do that)
Cons of re-sanding
- More labor and cost than cleaning alone
- Requires dry time and correct installation
- If you do it without cleaning first, it’s usually a waste
A good rhythm for many properties is: clean, re-sand, then decide on sealing based on sun exposure, traffic, and how much you want to maintain things.

Option 3: Seal (best for long-term protection, but only if the base work is done)
Sealing is the most “final” option, and also the one that gets oversold the most.
A sealer can absolutely help. It can also fail fast if it’s slapped on dirty pavers or over unstable joints.
What sealing actually does for weed growth
A quality paver sealer helps by:
- Reducing water penetration, so joints stay drier
- Locking in joint sand, especially when paired with polymeric sand
- Making surfaces easier to rinse clean, so less organic buildup sticks
- Slowing down algae and mildew staining, which often comes before weeds
But sealing does not mean “you will never see a weed again”.
Seeds can still land on top of pavers and sprout in dust or debris. The goal is to prevent the joint from becoming a rich growing medium and to make cleanup easier.
When sealing makes sense
Sealing is a strong choice if:
- You’ve already cleaned and re-sanded (or you’re ready to)
- Your pavers fade fast from sun and you want color enhancement
- You have heavy rain runoff or frequent irrigation hitting the area
- You’re tired of constant spot treatments for weeds and algae
- You want the “finished” look, not the chalky dry look
Types of paver sealers (simple, not nerdy)
- Penetrating sealers: soak in, more natural look, good for subtle protection
- Film-forming sealers: sit on top, can add sheen, can deepen color, more “sealed” feel
Film-formers can look amazing, but they need proper prep and maintenance. The wrong product (or incorrect application) can trap moisture or create whitening in humid environments. This is where local experience matters. Naples weather is not the same as a dry climate. You want products and application methods that work in heat, humidity, and sudden rain.
For more detailed insights on how to choose the right paver sealer, you might find this resource helpful: Paver sealers – what they are and how they work.
Pros of sealing
- Longest lasting protection
- Helps keep sand in place
- Easier ongoing maintenance
- Can improve appearance a lot (especially faded pavers)
Cons of sealing
- Highest upfront cost
- Needs correct prep and dry conditions
- Not permanent, it’s a maintenance cycle (just a longer one)
If you’re considering sealing and want it to last, it usually starts with professional cleaning and correct joint prep. That’s exactly the kind of project Naples Pressure Washing & Roof Cleaning can assist you with, including determining whether sealing is even worth it for your specific area. More information can be found here.
Clean vs. Re-Sand vs. Seal (quick cheat sheet)
Here’s the simplest way to choose.
Choose Clean only if:
- Weed growth is light
- Joints are still full
- You want a refresh and you’re ok doing maintenance more often
Choose Clean + Re-sand if:
- Joints are low or empty
- Weeds keep returning
- Ants are active
- Pavers feel like they’re loosening over time
Choose Clean + Re-sand + Seal if:
- You want the longest window between maintenance
- You care about appearance (color, uniform finish)
- Your area stays damp or shaded and grows algae constantly
- You want sand locked in and easier cleanup
A few practical tips that actually reduce weed regrowth
These are small, but they help.
- Adjust irrigation so sprinklers aren’t hammering the pavers every morning.
- Blow off debris (leaves, mulch dust) before it breaks down into soil in the joints.
- Spot treat early. One weed becomes ten. That’s not motivational, it’s just true.
- Don’t over-pressure joints. Aggressive washing can carve out sand and restart the whole cycle.
Also, if you’re using store weed killers constantly and nothing changes, that’s usually your sign you’re treating symptoms, not the cause.
What most people in Naples end up doing (the realistic plan)
If you want the honest, common path for pavers here:
- Start with a professional clean
- If sand is low, do a re-sand
- If you want less hassle long-term, do the seal after everything dries and is ready
That’s it. Not complicated, just easy to delay. Until your joints turn into little gardens again.
Closing thought (and a simple next step)
Weed growth between pavers is not a mystery. It’s usually a combination of moisture, missing joint sand, and organic buildup.
Cleaning helps. Re-sanding fixes the structure. Sealing helps keep it all from falling apart again.
If you’re in Naples, Bonita Springs, or Marco Island and you want someone to look at your pavers and tell you which option makes sense (without guessing), you can reach out to Naples Pressure Washing & Roof Cleaning for a quote or schedule. Start here: https://naples-pressure-washing.com/
FAQs (Frequently Asked Questions)
Why do weeds grow between paver joints even if the pavers were installed correctly?
Weeds grow in paver joints not because of dirty pavers but because the joints act like tiny planter boxes. Over time, sand washes out due to rain, sprinklers, or cleaning pressure, allowing organic debris like pollen, dirt, and leaves to settle. Moisture in humid areas like Naples creates a perfect environment for seeds or algae to take root and grow.
When is it sufficient to just clean the pavers without re-sanding or sealing?
Cleaning alone is effective when weeds are small and scattered, joints still contain most of their sand, and growth is mainly surface-level like algae or mildew. Proper cleaning involves pre-treatment to loosen organics, controlled washing that preserves joint integrity, thorough rinsing, and allowing the surface to dry fully before further treatment.
What does a proper paver cleaning process involve in Southwest Florida’s humid climate?
A proper cleaning includes pre-treatment to reduce mold and mildew spores, controlled washing that removes grime without damaging joints, careful rinsing especially near pools and landscaping, and ensuring the pavers dry completely before any re-sanding or sealing. This approach helps prevent quick regrowth in humid conditions prevalent in Southwest Florida.
Why is re-sanding paver joints important and when should it be done?
Re-sanding restores joint material after cleaning to prevent gaps that collect dirt and seeds. It should be done when you notice visible gaps or low sand levels in joints, ants tunneling through them, water erosion creating channels, recurring weeds despite treatment, or if pavers feel less stable. Re-sanding stabilizes pavers and slows weed regrowth significantly.
What are the differences between regular joint sand and polymeric sand for paver joints?
Regular joint sand is cheaper and easier to install but more prone to washing out during heavy rain or irrigation and allows future weed growth if debris collects. Polymeric sand contains binders that harden upon activation, resisting washout and reducing weed germination and ants. However, polymeric sand requires clean joints and correct installation to avoid failure or hazing.
What are the pros and cons of cleaning only versus re-sanding paver joints?
Cleaning only is cheaper, faster, provides immediate visual improvement, and works well for routine maintenance but doesn’t stabilize joints or prevent weeds long-term if sand is missing. Re-sanding requires more labor and cost but significantly slows weed regrowth by restoring joint stability and improving drainage. Combining both methods yields better lasting results.